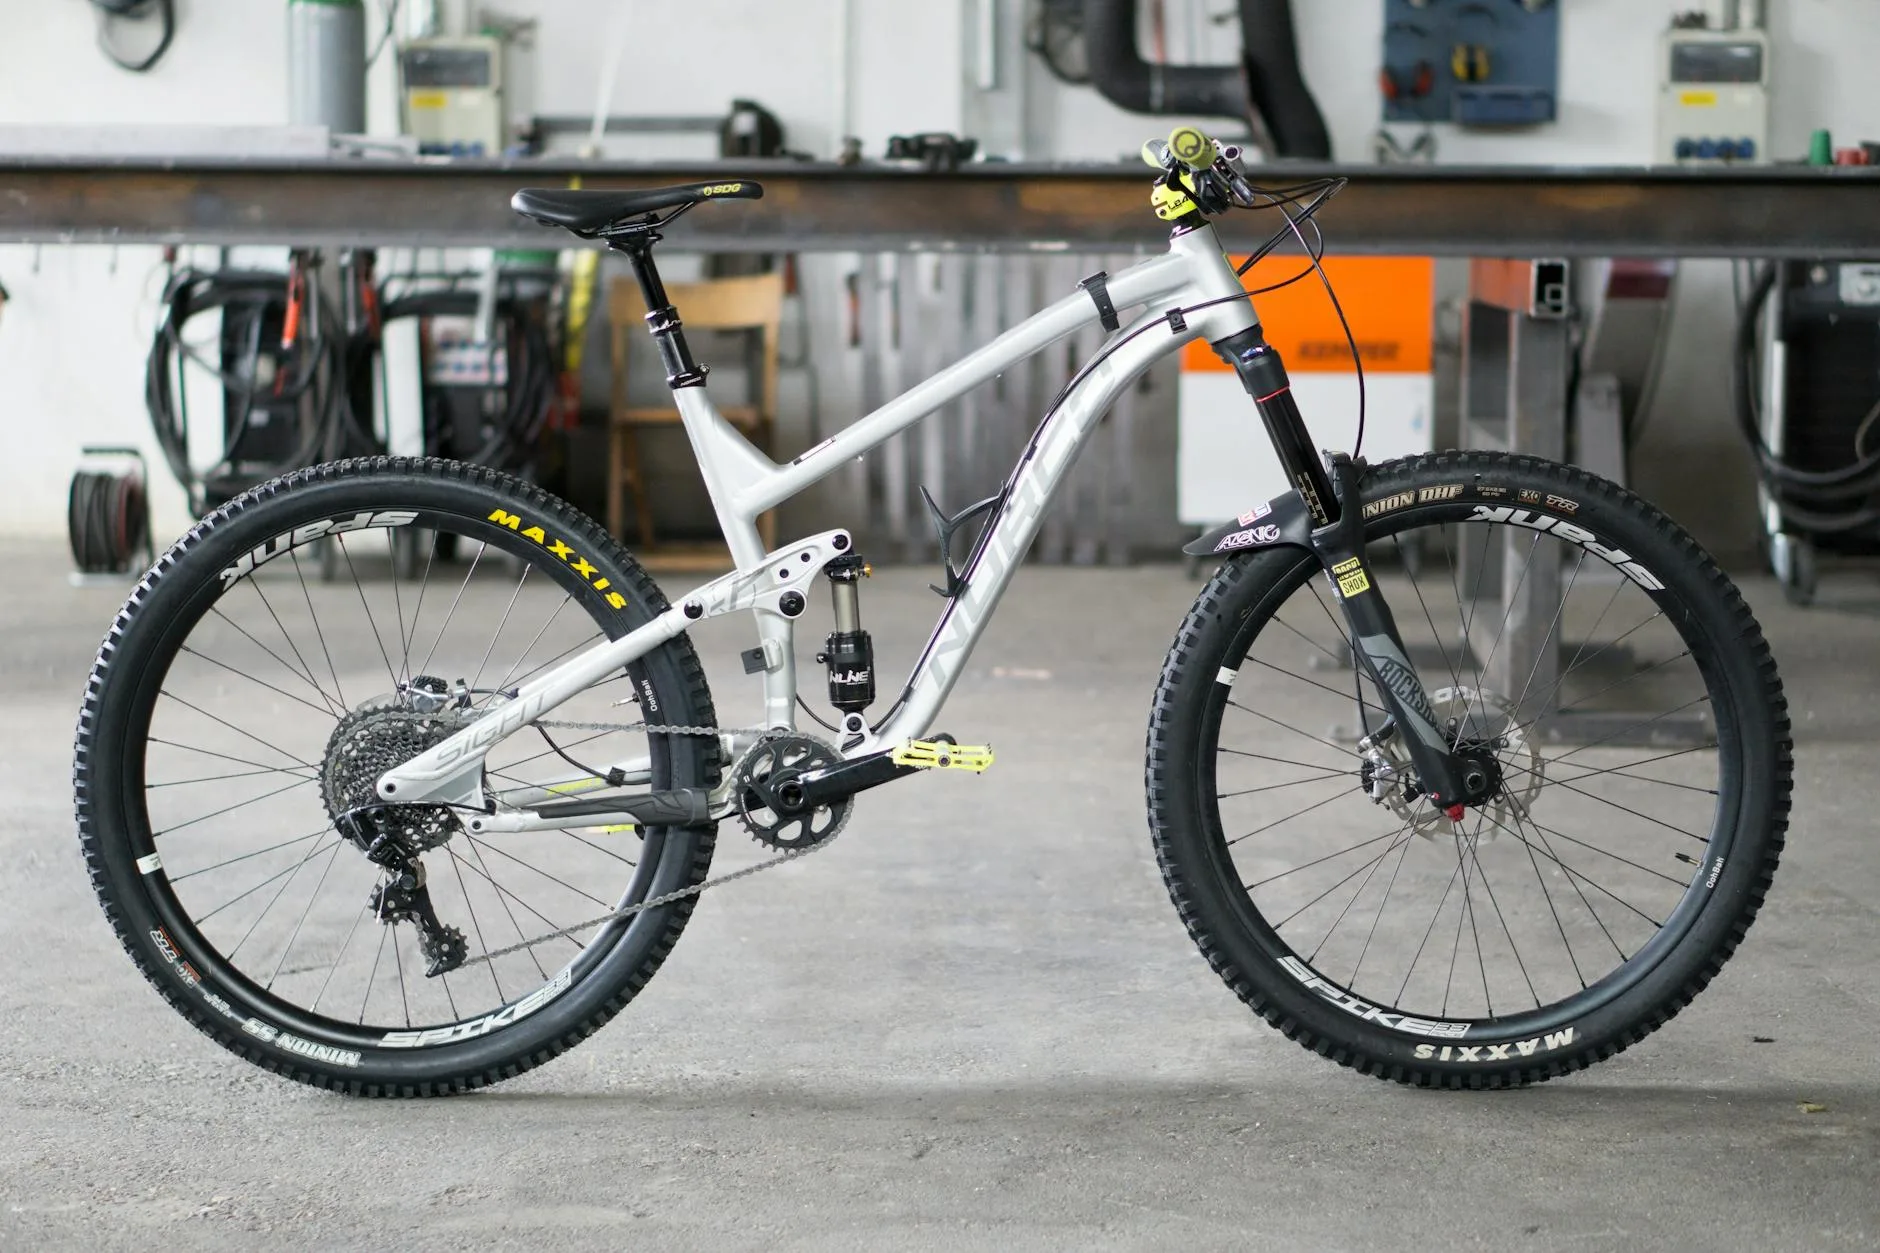
You’re standing in your garage, staring at what was once your pristine e-mountain bike. It’s now completely caked in thick, wet mud from today’s trail ride through the Welsh valleys. The battery compartment has dirt wedged around the seams, the chain looks like it’s wearing a clay coating, and there’s grass stuck to every surface. Your regular bike cleaning routine won’t cut it here — e-MTBs need a completely different approach when they’re this filthy.
In This Article
- Why E-MTBs Need Special Cleaning Care
- Pre-Clean Preparation: Safety First
- Essential Cleaning Supplies for Muddy E-MTBs
- Step-by-Step E-MTB Cleaning Process
- Drivetrain Deep Clean After Muddy Rides
- Drying and Lubrication Process
- What to Avoid When Cleaning E-MTBs
- Post-Clean System Checks
- Maintaining Your E-MTB Between Rides
Why E-MTBs Need Special Cleaning Care
Electric mountain bikes aren’t just heavier versions of regular MTBs — they’re complex machines with sensitive electronics that mud and water can destroy permanently. The motor housing, battery connections, and display unit all require careful attention during cleaning.
The main difference lies in the electrical components. Your traditional mountain bike can handle a full hose-down without worrying about short circuits or component failure. E-MTBs have ingress protection ratings (usually IP65 or IP67), but these aren’t bulletproof against high-pressure water or prolonged soaking.
Motor bearings are particularly vulnerable after muddy rides. Fine particles can work their way past seals, causing premature wear or complete failure. I’ve seen riders face £800+ motor replacement bills because they treated their e-MTB like a regular bike during cleaning.
The battery and its connections deserve special attention too. Mud around the charging port can cause corrosion, while dirt in the battery mounting system affects the secure connection between battery and motor. Poor connections lead to power delivery issues and potential safety hazards.
Electronic Components at Risk
Display units are surprisingly fragile when caked in mud. The buttons can jam with dried dirt, and water ingress around the mounting points causes screen failures. Most warranties don’t cover water damage, making prevention crucial.
Wiring harnesses run throughout the frame, connecting motor to battery to display. Mud can work into connection points, causing intermittent faults that are expensive to diagnose. These issues often appear weeks after the dirty ride, making the connection to poor cleaning practices less obvious.
Brake sensors (on e-MTBs with motor cutoff) are particularly sensitive to dirt buildup. When these fail, your motor might not cut power when braking, creating dangerous situations on technical terrain.
The e-bike battery guide explains more about protecting these expensive components from environmental damage.
Pre-Clean Preparation: Safety First
Before touching any cleaning supplies, you need to make your e-MTB electrically safe. This isn’t optional — it’s the difference between a successful clean and an expensive repair bill.
Battery Removal Process
- Turn off the e-MTB completely using the main power button, not just the display
- Remove the battery by unlocking the mounting mechanism (usually a key or lever system)
- Store the battery in a dry location away from cleaning areas — I use an old towel-lined cardboard box
- Check the battery compartment for obvious dirt or moisture before proceeding
Never attempt to clean around a mounted battery, even if it appears sealed. The mounting rails and connection points aren’t designed for direct water exposure during cleaning.
Motor Connection Protection
Most e-MTB motors have exposed connection points where the wiring harness meets the motor housing. These need covering before any water comes near the bike.
Use plastic bags secured with electrical tape to cover:
- Motor connection points (usually found near the bottom bracket)
- Display unit connections (where cables enter the head tube)
- Charging port (even with the rubber cover closed)
- Any exposed wiring along the frame
Don’t use standard tape — it doesn’t seal properly and can leave residue. Electrical tape or proper waterproof tape works better and removes cleanly afterward.
Work Area Setup
Set up your cleaning area on a slight slope so dirty water runs away from the bike, not under it. Concrete or tarmac works best — grass becomes a muddy mess and makes the job harder.
Position your bike in a repair stand if possible. This elevates the components above ground level and makes thorough cleaning much easier. If you don’t have a stand, lean the bike against a wall with the drivetrain facing outward.
Have all cleaning supplies ready before starting. Once you begin, you’ll want to work efficiently to minimize water exposure time.
Essential Cleaning Supplies for Muddy E-MTBs
Standard car shampoo won’t cut through the type of mud that accumulates during proper off-road riding. You need products specifically formulated for the job, plus tools that won’t damage delicate components.
Cleaning Products That Actually Work
Muc-Off Nano Tech Bike Cleaner (around £8-12 from Halfords) is highly effective on thick mud. It’s biodegradable, safe on all frame materials, and doesn’t require scrubbing that might damage cable housings or decals.
Degreaser is essential for the drivetrain. I use Finish Line Speed Degreaser (about £12 from online retailers) because it cuts through mud-contaminated chain lube without harming rubber seals or plastic components.
For stubborn dried mud, Park Tool CB-4 Bio ChainBrite (around £15) works better than generic degreasers. It’s designed for bike components and won’t damage anodized surfaces or cable housings.
Cleaning Tools and Equipment
Soft-bristled brushes are crucial. Avoid anything that could scratch painted surfaces or damage decals. I use a set of old toothbrushes for detailed work around derailleur pivots and brake calipers.
Microfiber cloths (pack of 10 for about £8 from Amazon UK) work better than paper towels or rags. They’re lint-free and won’t scratch delicate surfaces like LCD displays or carbon fiber.
A low-pressure spray bottle is safer than a hose for initial cleaning. You control exactly where water goes, reducing the risk of forcing moisture into sealed components.
Water Pressure Equipment
Garden hose with adjustable nozzle set to gentle spray mode works for most cleaning. Avoid jet wash settings that can force water past seals or damage spoke nipples.
Pressure washers can be used with extreme caution — keep them at least 1 meter away from the bike and use only the gentlest setting. Never direct high-pressure water at bearings, suspension seals, or electrical components.
Some riders prefer buckets of warm soapy water for the initial clean, using the hose only for final rinsing. This approach gives better control over water placement but takes longer.
Lubrication and Protection
Chain lubricant appropriate for your riding conditions is essential post-clean. Wet lubes for muddy conditions, dry lubes for dusty trails.
Frame protection spray like Muc-Off MO-94 (about £10) displaces moisture and provides temporary protection against future dirt accumulation.
GT85 or similar penetrating oil helps free seized components and displaces water from hard-to-reach areas. Apply sparingly — these products attract dirt if overused.
The key is having everything ready before you start. Nothing worse than realizing you’re out of degreaser halfway through cleaning a filthy drivetrain.
Step-by-Step E-MTB Cleaning Process
Work systematically from top to bottom, starting with the least contaminated areas and finishing with the drivetrain. This prevents recontaminating clean sections and ensures thorough coverage.
Initial Rinse and Assessment
- Use low-pressure water to remove loose mud and debris from the entire bike
- Avoid directing water upward into bottom bracket or headset areas
- Pay special attention to brake rotors — remove all visible dirt that could cause braking noise
- Check for any obvious damage or wear that might have occurred during the muddy ride
The goal isn’t to remove all dirt at this stage, just the loose material that makes the detailed cleaning easier. Thick mud often softens with initial water contact, making removal much simpler after a few minutes.
Frame Cleaning Technique
Apply bike cleaner liberally to all frame surfaces, working from top to bottom. Let it sit for 2-3 minutes to break down mud and dirt chemically rather than relying purely on mechanical action.
Use soft brushes to work the cleaner into textured surfaces, cable guide grooves, and around component mounting points. The brush action should be gentle — you’re lifting softened dirt, not scrubbing off paint.
Suspension components need extra care. Clean around fork stanchions and rear shock bodies without getting cleaner directly on the seals. These precision components are easily damaged by contamination or aggressive cleaning.
Wheel and Tire Cleaning
Start with the wheels off the ground (in a bike stand) to clean both sides properly.
- Remove any stones or debris wedged in tire treads using a blunt pick or screwdriver
- Clean tire sidewalls with soapy water and a soft brush
- Clean spokes individually, working from hub to rim on both sides
- Pay special attention to the rim braking surface or disc brake rotor mounting area
Mud between spokes is common after trail rides and affects wheel balance if left to dry and harden. Remove it thoroughly rather than just rinsing it off.
Brake System Cleaning
Contaminated brakes are dangerous — clean them properly every time. Disc brakes require special attention to rotor surface and caliper pistons.
Remove visible dirt from brake calipers using a brush and bike cleaner. Avoid getting cleaning products on brake pads or rotor surfaces — these can cause braking performance issues.
Brake rotors need cleaning with isopropyl alcohol or specific disc brake cleaner after the main wash. Soap residue causes squealing and reduced stopping power.
Rim brakes (less common on modern e-MTBs) need the rim surface cleaned thoroughly. Built-up mud and dirt creates uneven braking and accelerates brake pad wear.
Component Detailed Cleaning
Work through each component systematically:
Derailleur and cassette: Use degreaser and let it work for several minutes before scrubbing with a brush. The jockey wheels need particular attention as mud accumulates here quickly.
Crankset and chainrings: Remove visible dirt with brush and cleaner, paying attention to chainring teeth where mud affects shifting quality.
Handlebars and controls: Clean carefully around brake levers, shifters, and any electronic controls. Avoid getting water into switch mechanisms.
The process takes time, but thoroughness now prevents costly component replacements later. Shortcuts during cleaning become expensive problems.
Drivetrain Deep Clean After Muddy Rides
The drivetrain bears the brunt of muddy conditions and requires the most intensive cleaning. Mud mixed with chain lubricant creates an abrasive paste that accelerates component wear rapidly.
Chain Cleaning Process
Remove the chain completely if it’s severely contaminated — this allows proper cleaning of both chain and chainrings. Use a chain quick-link or master link for easy removal and reinstallation.
- Soak the removed chain in degreaser for 10-15 minutes
- Use an old toothbrush to scrub between chain links, removing all visible contamination
- Rinse thoroughly with clean water until no degreaser residue remains
- Dry completely with clean rags before reinstallation
If removing the chain isn’t practical, use a chain cleaning tool filled with degreaser. Run the chain through the tool several times until the solvent comes out clean.
Never use household degreasers on bike chains — they can damage rubber O-rings in the chain links or leave residues that attract more dirt.
Cassette and Chainring Cleaning
Mud between cassette cogs affects shifting precision and accelerates wear. Clean each gap individually using a brush or plastic spoke.
For stubborn deposits, soak the area with degreaser and let it work for several minutes. The chemical action loosens compacted material that mechanical cleaning alone can’t remove.
Chainring teeth need individual attention. Bent or damaged teeth (common after rock strikes) become obvious during cleaning and need addressing before the next ride.
Derailleur System Maintenance
The rear derailleur accumulates the most contamination and has the most moving parts requiring attention.
Clean around:
- Jockey wheels (remove if heavily contaminated)
- Pivot points (use light oil after cleaning)
- Limit screw adjusters (dirt here affects gear range)
- Cable entry points (contamination causes sticky shifting)
Check derailleur alignment during cleaning. Impact damage from muddy crashes often goes unnoticed until shifting problems develop.
Bottom Bracket Area
This area collects mud and water, making it prone to bearing wear if not cleaned properly. Remove obvious contamination but avoid forcing water directly into bearing seals.
Use compressed air (if available) to blow water out of the bottom bracket shell after cleaning. Trapped moisture here causes expensive bearing failures.
The motor housing on e-MTBs sits in this area too. Clean around it carefully, avoiding high-pressure water near electrical connections.
Drying and Lubrication Process
Proper drying prevents corrosion and ensures lubricants adhere correctly. Rushing this stage undoes all the careful cleaning work.
Complete Drying Technique
- Remove as much water as possible using clean, lint-free cloths
- Pay special attention to recessed areas where water pools
- Use compressed air to blow water from hard-to-reach areas
- Allow air drying for at least 30 minutes before applying lubricants
Areas that trap water include: derailleur pivots, brake caliper recesses, cable housing entry points, and around the motor housing. Check these specifically and dry thoroughly.
Chain Lubrication Protocol
Apply lubricant to a completely dry chain for best results. Wet chains dilute the lubricant and reduce its effectiveness.
For muddy conditions: Use wet lubricant that resists washing off. Apply one drop per chain link while slowly rotating the cranks.
For dry conditions: Use dry lubricant that doesn’t attract as much dirt. The application method is identical.
After application, run through all gears several times to distribute lubricant evenly. Wipe excess lubricant from the outside of the chain — it only attracts dirt without providing benefit.
Moving Parts Lubrication
Derailleur pivots need light lubrication after cleaning. Use specific bike lubricant, not general-purpose oils that collect dirt.
Brake and shift lever pivots benefit from occasional lubrication, but use it sparingly. Too much attracts dirt and affects control precision.
Suspension pivots (full-suspension bikes) may need attention if contaminated during the ride. Follow manufacturer specifications for lubricant type and quantity.
Cable and Housing Maintenance
Cable housing can trap water after muddy rides. If shifting feels sticky after cleaning, water in the housing might be the cause.
Disconnect cables and blow compressed air through housing to remove trapped moisture. Replace housing if internal corrosion is visible — it’s cheaper than replacing damaged cables later.
Electronic shifting systems need different care. Clean contacts carefully and ensure all connections are dry before reconnecting.
What to Avoid When Cleaning E-MTBs
Common cleaning mistakes can cause expensive damage. These aren’t theoretical risks — they’re based on actual component failures I’ve witnessed.
High-Pressure Water Dangers
Never direct pressure washers at bearings, even from a distance. The high-pressure water forces past seals designed for normal water resistance, washing out grease and contaminating bearing races.
Avoid upward-angled water spray into the bottom bracket, headset, or wheel bearings. Gravity helps water penetrate seals when sprayed from below.
Motor housing seals aren’t designed for direct high-pressure water. Keep pressure washers at least 1 meter away and use only gentle settings near electrical components.
Chemical Product Mistakes
Household cleaners like bleach or kitchen degreasers can damage anodized components, painted surfaces, and rubber seals. Stick to bike-specific products.
Automotive products often contain solvents too aggressive for bike components. Car wash soap might strip protective coatings from aluminum parts.
Acetone or strong solvents will damage painted surfaces and plastic components. They’re unnecessary for bike cleaning and cause more problems than they solve.
Lubrication Errors
Over-lubricating attracts dirt and creates more problems than under-lubricating. A thin film is all that’s needed on most components.
Wrong lubricant types cause issues too. Don’t use wet lube in dusty conditions or dry lube in persistently wet weather.
Lubricating dirty components traps contamination against wearing surfaces. Always clean before lubricating.
Electrical Component Risks
Never submerge the display unit, even if it’s rated waterproof. The rubber seals around buttons can fail, allowing water ingress.
Charging ports need careful attention. Water trapped behind rubber covers causes corrosion that’s expensive to repair.
Connection points where cables join components are vulnerable. Avoid direct water spray and dry thoroughly after cleaning.
Component-Specific Warnings
Suspension seals are easily damaged by cleaning brushes or high-pressure water. Clean around them, not directly on them.
Carbon fiber components can be damaged by aggressive brushing or strong chemicals. Use gentle techniques and bike-specific cleaners.
Electronic shifting components need extra care. Water in the wrong places causes expensive failures that warranties don’t cover.
Understanding these risks helps prevent the expensive mistakes that turn routine maintenance into major repair bills.
Post-Clean System Checks
A thorough cleaning reveals issues that dirt and mud can hide. Check everything systematically before your next ride.
Electrical System Verification
Battery replacement first — ensure clean, dry connections before reinstalling. Check the battery compartment for any water that might have penetrated during cleaning.
Display function test — turn on the system and verify all functions work normally. Stuck buttons or erratic display behavior indicates water ingress.
Motor engagement — test that the motor engages smoothly in all assist modes. Rough engagement or unusual noises suggest contamination in the motor housing.
Mechanical Component Inspection
Brake function needs thorough testing after cleaning. Check that levers feel firm and brakes engage consistently without squealing.
Shifting performance through all gears reveals whether contamination remains in the drivetrain or if cables need adjustment.
Wheel bearing check by spinning wheels freely — they should rotate smoothly without grinding or clicking noises.
Safety-Critical Checks
- Inspect brake pads for contamination from cleaning products
- Verify all quick-release levers and through-axles are properly secured
- Check tire pressures — they often drop during extended cleaning sessions
- Test suspension function if equipped
Torque specifications on critical bolts may need verification if components were removed for cleaning. Use a torque wrench for safety-critical components like stem bolts and brake calipers.
Performance Baseline
Take note of how everything feels after cleaning. This becomes your baseline for detecting developing issues before they become expensive problems.
Shifting quality should be crisp and precise. Hesitation or roughness indicates adjustment needed or contamination remaining.
Brake feel should be consistent and progressive. Spongy or grabby brakes need immediate attention before riding.
Motor operation should be smooth and quiet. New noises after cleaning suggest water ingress or contamination.
Documentation for Warranty
Photograph any damage discovered during cleaning. This documentation can be valuable for warranty claims if issues develop later.
Record cleaning dates and products used. Some manufacturers require maintenance records for warranty coverage.
If you discover serious issues during post-clean inspection, address them before riding. The cost of proper repair is always less than the cost of component failure on the trail.
Maintaining Your E-MTB Between Rides
Consistent maintenance prevents the severe contamination that makes deep cleaning necessary. Small efforts between rides save hours of intensive cleaning later.
Post-Ride Quick Clean
Immediate attention to mud and dirt prevents it hardening and becoming difficult to remove. Even a quick rinse makes the next proper clean much easier.
Drive chain wipe-down after every muddy ride keeps the drivetrain functioning properly and extends component life considerably.
Battery care includes wiping down connections and ensuring the charging port cover is clean and properly sealed.
Weekly Maintenance Routine
Chain lubrication needs attention weekly if you ride regularly in muddy conditions. Clean, dry, and lubricate properly — don’t just add more lube to dirty components.
Tire inspection for embedded thorns, glass, or stones prevents punctures and extends tire life.
Brake check ensures consistent performance and identifies issues before they become dangerous.
Seasonal Deep Maintenance
Professional service twice per year addresses bearing wear, suspension service, and electrical system checks beyond normal user maintenance.
Battery health monitoring includes checking charge cycles and capacity. The best e-bike battery bag explains proper storage and transport to extend battery life.
Component replacement planning based on wear patterns helps avoid mid-ride failures and expensive emergency repairs.
Storage Considerations
Clean storage prevents contamination from hardening and becoming more difficult to remove later.
Battery removal for long-term storage prevents deep discharge and extends battery life.
Regular checks even when not riding help identify developing issues before they become expensive problems.
Consistent maintenance is cheaper and easier than dealing with neglected components. The time invested in routine care pays dividends in reliability and component longevity.
Prevention always costs less than cure — both in time and money. A well-maintained e-MTB provides years of reliable service, while a neglected one becomes an expensive liability.
For more guidance on protecting your investment, check out our detailed best electric mountain bike UK guide and learn about disposing of damaged e-bike batteries safely when components reach end of life.
Frequently Asked Questions
How often should I deep clean my e-MTB after muddy rides? After every heavily muddy ride where dirt accumulates in the drivetrain or around electrical components. Light surface dirt can wait, but thick mud mixed with chain lube creates abrasive paste that damages components quickly.
Can I use a pressure washer on my e-MTB? Yes, but with extreme caution. Keep the pressure washer at least 1 meter away, use only gentle settings, and never direct high-pressure water at bearings, electrical components, or suspension seals. Low-pressure garden hose is often safer.
Is it safe to remove the battery every time I clean? Yes — it’s essential for proper cleaning safety. The battery removal and reinstallation process is designed for regular use and prevents water damage to expensive electrical components.
What’s the biggest mistake people make when cleaning e-MTBs? Using high-pressure water near electrical components and bearings. The second biggest is not drying thoroughly before lubrication, which traps moisture and accelerates corrosion.
How do I know if I’ve damaged something during cleaning? Test all systems after cleaning: motor engagement, shifting, braking, and display function. Unusual noises, sticky operation, or erratic electrical behavior indicate water ingress or damage requiring immediate attention.
Should I clean my e-MTB differently in winter? Yes — winter road salt is more corrosive than summer mud. Rinse immediately after rides to prevent salt accumulation, and pay extra attention to drying all components to prevent corrosion in lower temperatures.