E-MTB rear suspension maintenance service intervals matter because an electric mountain bike loads its shock, pivots and bearings harder than a normal trail bike. The motor helps you climb more often, the bike usually weighs 22-27kg, and UK winter mud gets pushed into every pivot gap. If the back end starts knocking, wallowing or sitting too deep in its travel, do not just add air and hope.
In This Article
- What Rear Suspension Maintenance Actually Covers
- Sag: The Five-Minute Check That Changes Everything
- Bearings, Pivots and Bushings: What Wears First
- Shock Service Intervals: Air Can, Damper and Full Rebuild
- Cleaning and Lubrication After UK Mud
- When to DIY and When to Pay a Workshop
- A Practical Rear Suspension Maintenance Schedule
- Frequently Asked Questions
What Rear Suspension Maintenance Actually Covers
Rear suspension maintenance is not one job. It is three separate checks that happen at different intervals: rider setup, frame pivot condition, and shock servicing. Mixing those together is where many E-MTB owners waste money.
The three parts of the system
Your rear suspension is made up of:
- The rear shock: the air spring or coil unit that controls travel, rebound and damping.
- The linkage: the frame arms, rocker link and pivot hardware that move as the suspension compresses.
- The bearings and bushings: the small wear parts that let the linkage rotate without grinding into the frame.
A £4,500 Cube, Trek, Specialized, Haibike or Whyte E-MTB can feel awful if the sag is wrong, even when nothing is broken. The same bike can also feel fine in the car park while a pivot bearing is dry, rusty or starting to ovalise the hardware. That is why e-mtb rear suspension maintenance service intervals need both regular home checks and occasional workshop work.
If you are still comparing bike types, read our guide to the Cube vs Trek vs Haibike E-MTB brands. This article assumes you already own the bike and want the rear end to last.
Why E-MTBs are harder on suspension
An E-MTB usually does more climbing in a single ride than a non-assisted mountain bike because the motor removes the misery from repeated ascents. That means the rear suspension cycles more often. Add the extra bike weight, battery mass, motor torque and wet trail grit, and the pivots have a harder life.
The legal UK assistance limit also matters. A road-legal electric bike must meet the EAPC rules, including a 250W continuous rated motor and assistance cutting off at 25km/h; GOV.UK explains those electric bike rules. Trail riding below that speed still puts plenty of torque through the frame, especially on steep, rocky climbs.
My rule is simple: if the bike gets regular muddy trail use, treat the rear suspension as a service item, not a sealed-for-life part. That sounds boring until a £20 bearing becomes a damaged linkage or a seized pivot bolt.
Sag: The Five-Minute Check That Changes Everything
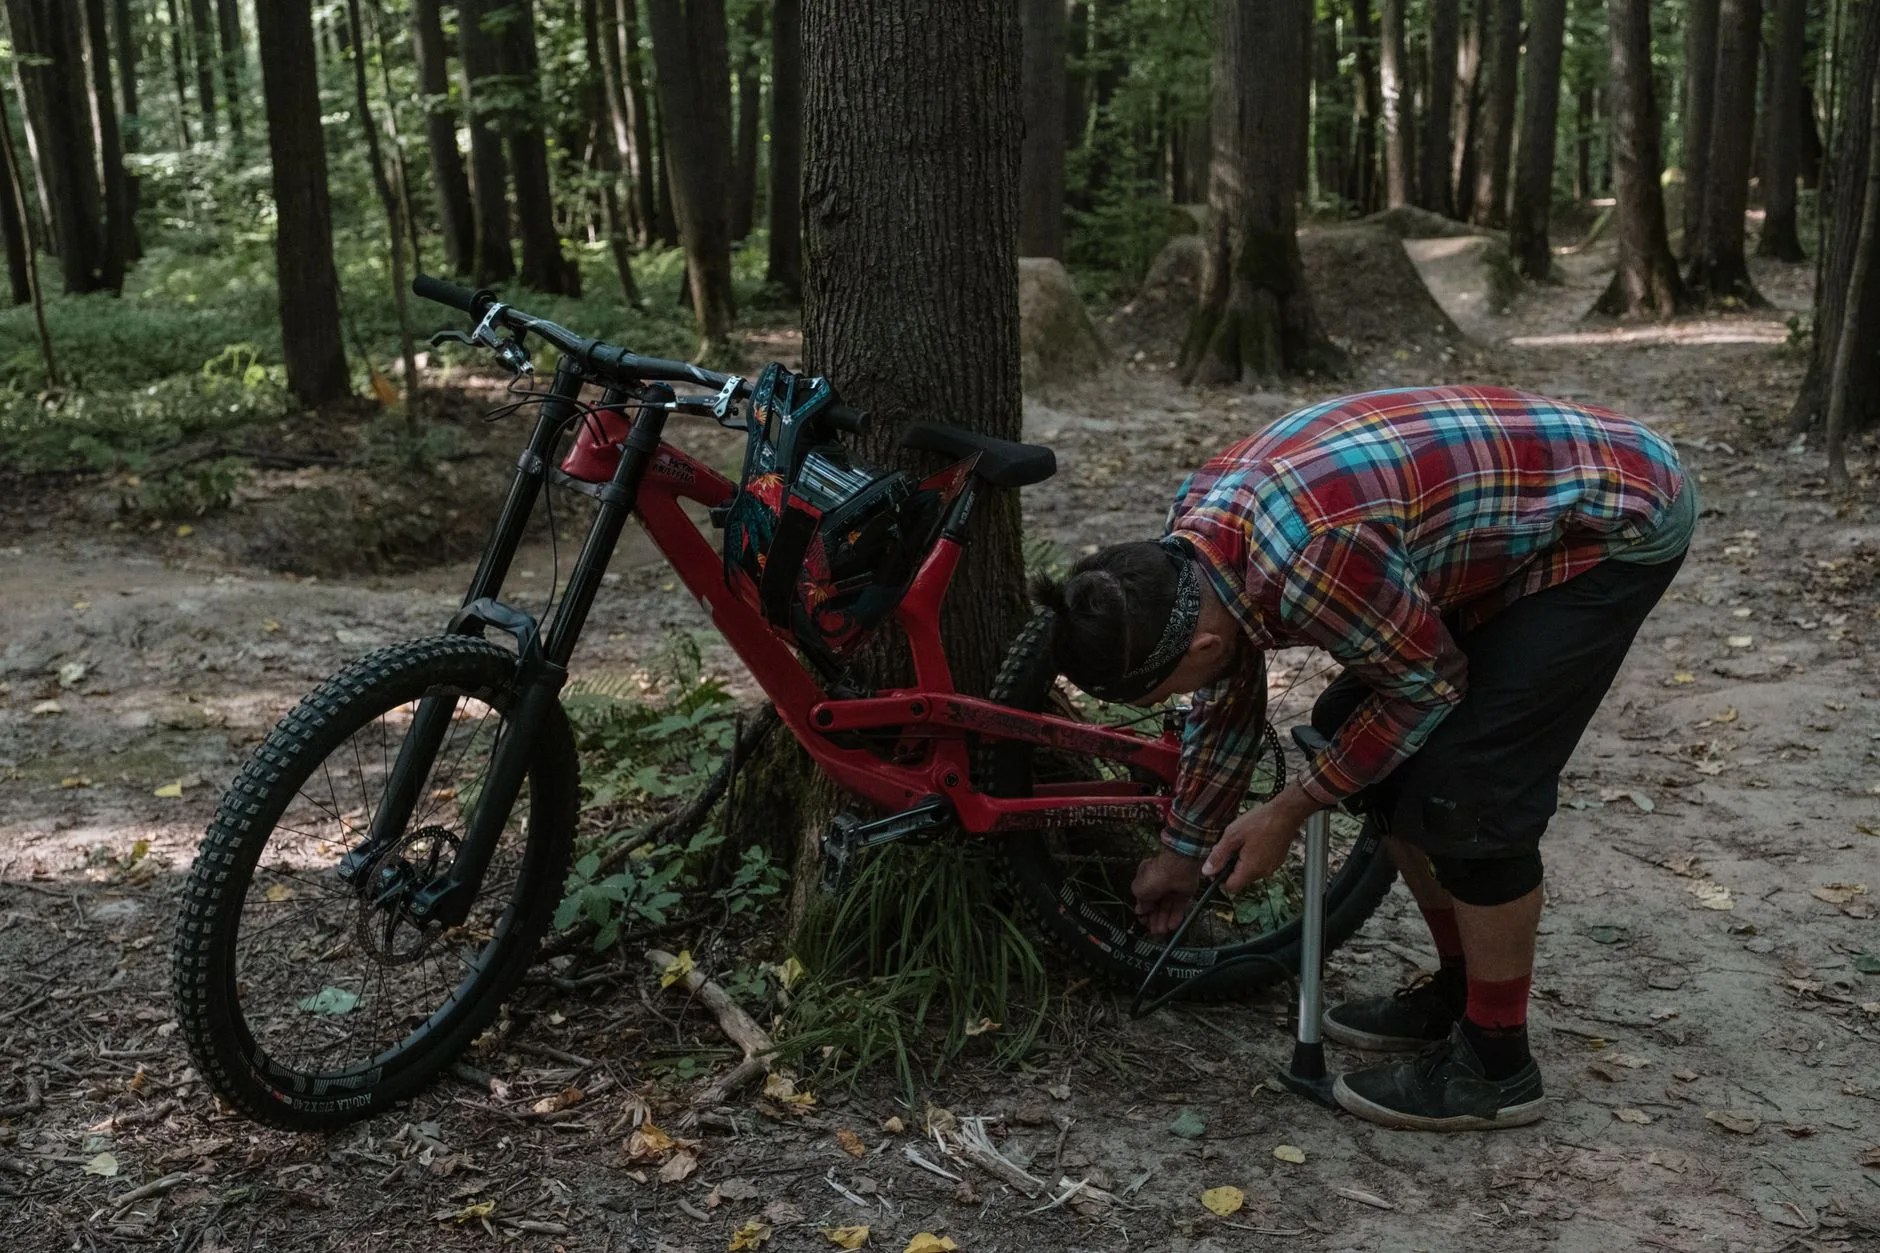
Sag is the amount of rear travel used when you sit on the bike in your normal riding kit. It is the cheapest part of E-MTB suspension setup to get right, and it is the check I would do before buying upgrades, swapping tyres or blaming the shock.
What sag number should you aim for?
Most trail and enduro E-MTBs feel right at about 25-30% rear sag. A 150mm rear-travel bike would usually sit around 38-45mm into its travel with you on board. Lighter trail bikes may prefer the lower end. Steeper, rougher riding often needs the higher end.
Manufacturer setup charts are a starting point, not gospel. Fox and RockShox both publish pressure and service guidance for their shocks, but rider weight distribution, frame leverage rate and luggage can shift the number. A shock pump costs about £25-£45 from Halfords, Tredz, Sigma Sports or Amazon UK. Buy one before you buy volume spacers, because guessing pressure by thumb feel is hopeless.
How to check sag properly
Use one continuous routine:
- Set rebound in the middle: count the clicks from fully closed to fully open, then start halfway so the bike is not packing down or kicking back during setup.
- Wear your normal kit: helmet, pack, water, tools and any battery extender matter. A full hydration pack can add 2-3kg.
- Slide the O-ring to the shock seal: if the O-ring is missing, use a small cable tie lightly around the shaft, then remove it after setup.
- Get on the bike gently: use a wall, workstand or doorway for balance. Do not bounce.
- Step off without compressing the bike: measure the O-ring movement against total shock stroke or use the sag markings if your shock has them.
If the rear end sits too deep, add air in 5-10psi steps. If it barely moves, remove air in the same small steps. On a coil shock, changing sag usually means preload adjustment or a different spring rate, so the cost jumps from a free air-pressure tweak to about £35-£90 for a spring.
Signs the sag is not the real problem
Sag checks cannot hide mechanical wear forever. If the pressure is correct but the bike still feels loose, harsh or inconsistent, look deeper. A rear end that knocks under braking, creaks when you pedal seated, or shifts sideways when you lift the saddle is probably telling you about bearings, bushings or hardware.
Do the sag check monthly if you ride often. Air shocks lose a little pressure over time, and the first cold weekend in November can make a bike feel different from a warm September setup. No drama, just physics.
Bearings, Pivots and Bushings: What Wears First
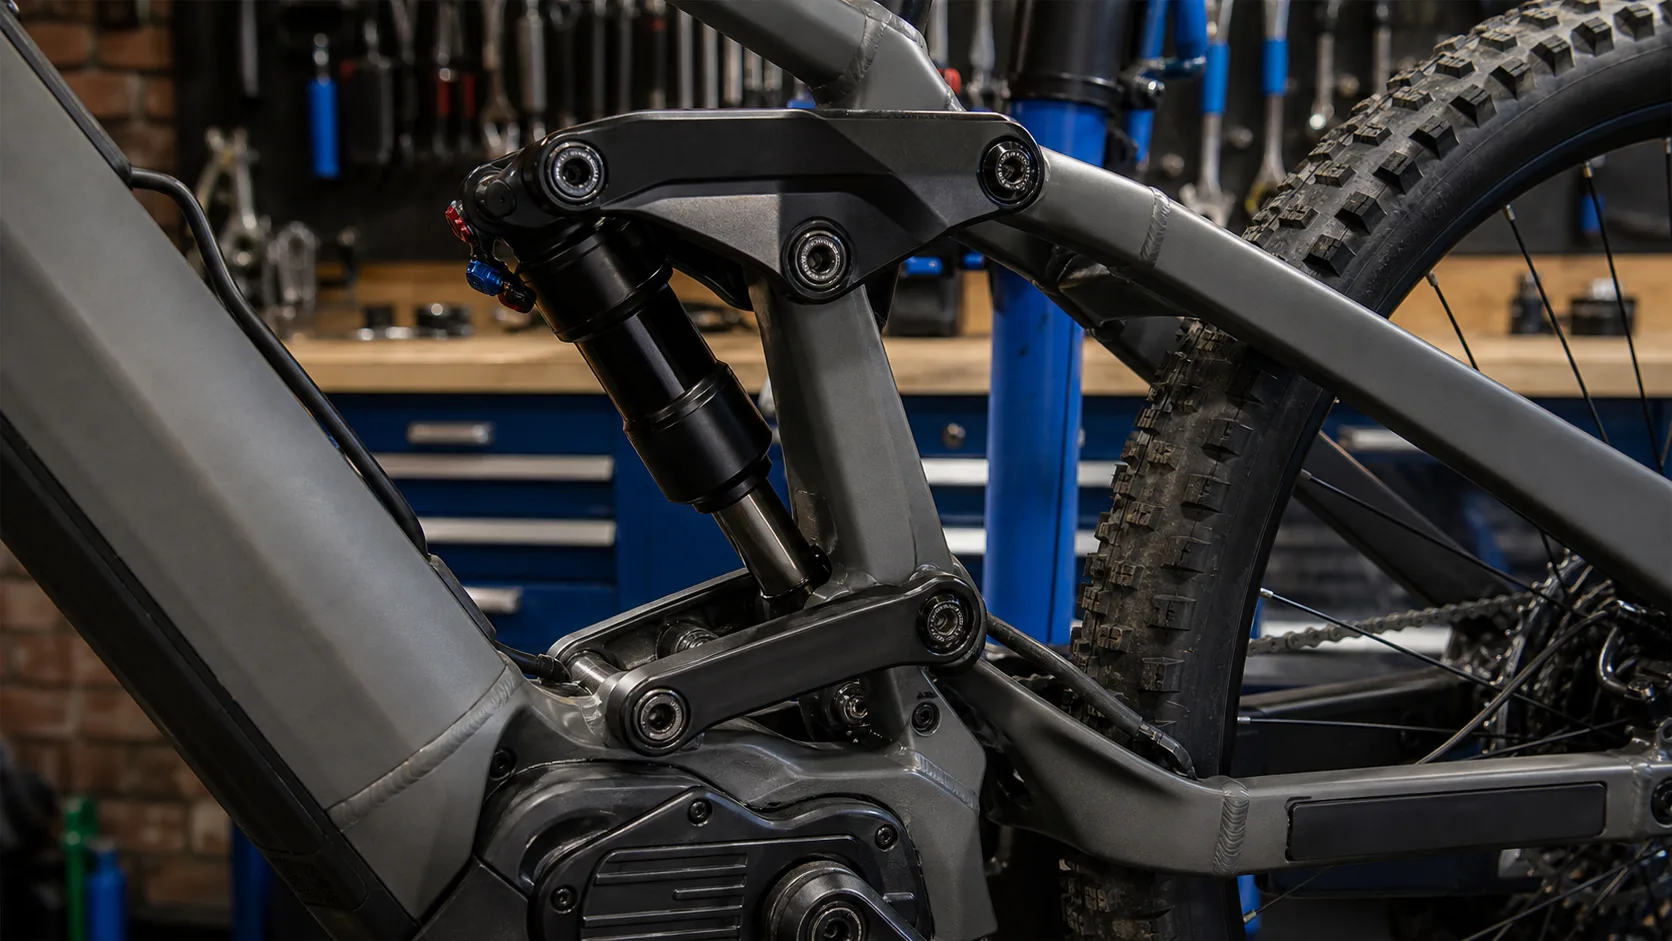
Pivot bearings are small, cheap parts doing an ugly job. They sit low in the frame, close to spray, grit and wash water. On an E-MTB they also deal with more repeated torque because you are likely to climb seated and powered for longer.
The quick bearing play test
Put one hand on the saddle and one hand on the rear wheel. Lift the bike a few centimetres and feel for a knock as the suspension unloads. Then hold the rear brake and rock the bike back and forth. Some brake pad movement is normal, but a dull clunk from the frame pivots is not.
Next, stand beside the bike and push the rear wheel side to side. You are not trying to bend anything; you are feeling for movement between the rear triangle and main frame. If the tyre moves but the frame does not, check wheel bearings and axle tightness. If the rear triangle shifts, suspect pivot bearings or hardware.
What replacement costs in the UK
Individual cartridge bearings are often £4-£12 each. A full frame bearing kit is commonly £35-£90 from brands such as Enduro Bearings, Kinetic Bike Bearings or the bike manufacturer. Labour is where the bill grows. A UK workshop may charge £80-£180 for a pivot bearing replacement, depending on access, seized bolts and whether the motor or chainset gets in the way.
For home mechanics, a decent torque wrench costs about £35-£80, waterproof grease such as Park Tool PPL-1 is about £9-£13, and a proper bearing press/puller kit is usually £60-£160. The cheap Amazon UK kits around £25-£40 can work on simple jobs, but I would not use one near an expensive carbon linkage unless the drifts fit perfectly.
Do not ignore shock mounting hardware
Rear shock eyelet bushings and mounting hardware wear as well. A worn DU bushing or trunnion mount can feel like frame bearing play. Replacement hardware is often £10-£35, and many workshops will fit it during an air-can service if you ask.
This is where a small amount of scepticism helps. If a shop quotes for a full bearing kit, ask whether they found play in every pivot or just one linkage. Sometimes a £20 hardware refresh fixes the knock. Sometimes every bearing is gritty. Both happen.
Shock Service Intervals: Air Can, Damper and Full Rebuild
The rear shock has its own service schedule separate from the frame. This is the part most riders delay because the bike still moves up and down. By the time the shock feels terrible, seals, oil and bushings have usually been unhappy for a while.
Air-can service
An air-can service replaces the outer seals and lubricating oil in the air spring. For Fox, RockShox, Marzocchi and similar air shocks, many riders treat 50 riding hours as the light-service interval. If you ride wet trail centres most weekends, that can arrive faster than you think.
A seal kit is usually £18-£35. Workshop labour for an air-can service is commonly £35-£60, so a realistic UK bill is around £55-£95. It is one of the better-value services because it keeps the shock supple and helps protect the damper shaft.
Competent home mechanics can learn this job, but follow the shock maker’s instructions. Releasing air pressure fully is not optional. If that sentence makes you wince, pay the shop.
Damper service and full rebuild
A damper service is more involved. It deals with the oil and internal damping circuit that controls rebound and compression. Many brands suggest a deeper service around 100-200 riding hours depending on model and conditions. TF Tuned, Silverfish, Sprung Suspension, Plush Suspension and many local bike shops offer shock servicing in the UK.
Expect about £120-£220 for a full rear shock service once postage, seals and small parts are included. More complex shocks, stuck hardware or damaged shafts cost more. A replacement rear shock can be £250-£650, so servicing is not just fussiness.
For broader running costs beyond suspension, our guide to E-Bike Maintenance Schedule: What Needs Doing and When puts suspension alongside brakes, tyres, drivetrain and battery care.
Coil shock differences
Coil shocks skip air-can seal checks but still need damper servicing. They also need spring-rate checks if your weight, riding style or luggage changes. A steel coil is often £35-£80; a lightweight spring can be £90-£160. Do not wind loads of preload onto a spring to fake the correct rate. It can make the bike harsh early in the travel and still blow through travel on bigger hits.
The useful habit is to write down your shock pressure, rebound clicks, compression setting and service date. A note in your phone beats trying to remember if last winter’s setup was 185psi or 205psi.
Cleaning and Lubrication After UK Mud
UK mud is not one thing. Sandy trail-centre grit, clay, chalk and road salt all attack suspension differently. The maintenance goal is to remove abrasive dirt without forcing water past seals or stripping grease from bearings.
What to do after a muddy ride
Rinse the bike gently. Use a low-pressure hose, not a pressure washer aimed at pivots, motor seals or shock wipers. A bucket, soft brush and bike cleaner such as Muc-Off Nano Tech at about £8-£12 or Fenwicks Bike Cleaner at about £9-£13 is enough for most rides.
Focus on these areas:
- Shock shaft: wipe it with a clean microfibre cloth so dirt is not dragged past the wiper seal.
- Pivot gaps: brush away packed mud, especially around the lower linkage.
- Lower shock mount: this area catches spray and can hide worn hardware.
- Chainstay bridge and motor area: trapped debris here can make noises that sound like suspension problems.
After washing, bounce the bike a few times and wipe the shock shaft again. If a dirty ring appears immediately, keep cleaning until the shaft comes back clean.
What not to spray
Do not spray GT85, WD-40 or general water-displacing sprays onto shock seals and pivot bearings. They can wash grease away and attract grime. If a pivot creaks, diagnose it properly rather than drowning it in aerosol.
A small bottle of suspension-safe stanchion lube is about £7-£12, but it is not magic. Use it only if the shock maker allows it, wipe away excess, and never let oil run onto brake discs or pads. If your rear brake starts howling after a cleaning session, you may have contaminated it. Our disc brake squeal guide covers that separate problem.
Storage matters too
If the bike lives in a shed, dry it before storage. A damp E-MTB parked after every ride is hard on bearings, bolts, chains and electrical contacts. A basic floor stand is £20-£45 from Decathlon, Halfords or Amazon UK and keeps the bike upright so water does not pool around one side of the linkage.
For riders storing a battery separately, our overnight E-bike battery storage guide covers the fire-safety side. Suspension care does not replace safe charging and storage habits.
When to DIY and When to Pay a Workshop
Some rear suspension maintenance is easy home work. Some jobs are expensive because they need precision, not because bike shops enjoy charging for mysterious rituals.
Good DIY jobs
Most owners can handle:
- Sag and rebound checks: shock pump, tape measure and a notebook.
- Cleaning: gentle wash, brush, microfibre cloth and patience.
- Bolt checks: torque wrench and manufacturer torque values.
- Basic play checks: rear-wheel rock, brake-held movement and listening for knocks.
A home kit for those jobs costs roughly £75-£150: shock pump £25-£45, torque wrench £35-£80, decent Allen/hex bits £15-£30, bike cleaner and cloths £15-£25. That is less than one large workshop bill and pays back quickly.
Workshop jobs I would not bodge
I would pay a workshop for seized pivot bolts, press-fit bearing replacement on a carbon frame, damper servicing, trunnion shock hardware if access is poor, and any job where the motor mount or main pivot shares hardware. The downside of getting these wrong is not just a failed ride. It can mean damaged frame threads or ovalised bearing seats.
If your bike is still under warranty, be careful. Brands may expect service records for suspension, motor and battery claims. Keeping receipts from a recognised shop is useful evidence if a linkage, shock or frame part fails early.
How to talk to the shop
Be specific. “The rear end knocks when I lift the saddle and I can feel side play near the lower link” is much more useful than “the suspension feels weird”. Ask for the old bearings back if a full kit is replaced. A decent mechanic will not mind.
You can also ask for a pre-service inspection. Some shops charge £20-£40 to diagnose play and then take that off the repair if you book the work. That is money well spent if it prevents a full shock service when the problem is a £15 bushing.
For wider ownership checks before you buy, our E-bike test ride checklist is useful because many suspension faults show up in the first ten minutes if you know what to feel for.
A Practical Rear Suspension Maintenance Schedule
Here is the schedule I would use for a UK E-MTB that sees regular trail riding, not just canal paths and dry summer bridleways.
After every wet or muddy ride
Rinse gently, clean the shock shaft, brush mud from pivot gaps, bounce the bike and wipe the shaft again. Check for fresh oil rings around the shock. A faint lubrication line can be normal; wet oil running down the shaft is not.
Monthly
Check sag, shock pressure, rebound setting, pivot play and rear-axle tightness. Spin the cranks and compress the suspension while listening for clicks or creaks. If you changed tyres, added a rack, started carrying more water or gained/losing weight, repeat the sag setup.
This is also a good time to inspect the rear tyre and drivetrain because those can disguise suspension issues. A worn rear tyre can make the bike feel skittish, while a stretched chain makes climbing feel rough. Our guide to when to replace an E-bike battery is separate, but the same habit applies: catch wear before it becomes a ride-ending failure.
Every 50 riding hours
Consider an air-can service if you run an air shock, especially after winter. Light riders on dry trails might stretch it; heavier riders on wet E-MTB routes should not. Budget £55-£95 at a UK shop or £18-£35 for a seal kit if you are doing it yourself.
Every 100-200 riding hours
Plan for a damper service and a frame bearing inspection. If you ride BikePark Wales, Forest of Dean, Afan, Glentress or rocky Peak District routes regularly, lean toward the earlier end. If you mostly ride smooth local loops in summer, the later end may be fine.
Cycling UK has useful maintenance advice for everyday bikes, but full-suspension E-MTBs add more moving parts and higher loads; their general bike maintenance guidance is a baseline, not a substitute for shock-brand intervals.
Before a big trip
Do not service the shock the night before a riding weekend unless you have no choice. Check sag, play and bolts at least a week ahead so there is time to fix problems. A rear shock that comes back from service may need a short setup ride before it feels right.
The bottom line: rear suspension maintenance is cheaper when it is boring. A regular wipe, sag check, bearing check and planned service interval can keep a £5,000 E-MTB feeling sharp instead of turning every ride into a noise hunt.
Frequently Asked Questions
How often should I service E-MTB rear suspension? Check sag and pivot play monthly, clean the shock shaft after muddy rides, consider an air-can service around every 50 riding hours, and plan a damper service roughly every 100-200 riding hours depending on conditions.
How much does rear shock servicing cost in the UK? A basic air-can service is often about £55-£95 including parts and labour. A full rear shock damper service is more commonly £120-£220, with complex shocks or damaged parts costing more.
Can I replace E-MTB pivot bearings myself? You can if you have the correct bearing press, torque wrench, drifts and manufacturer instructions. If the frame is carbon, the bolts are seized or the bearing seats are tight, a workshop is safer.
What does worn rear suspension feel like? Common signs include knocking when lifting the saddle, side play at the rear wheel, creaking under seated pedalling, harsh early travel, poor small-bump grip or the shock losing air between rides.
Should I use a pressure washer on my E-MTB suspension? No. A pressure washer can drive water past seals and into bearings. Use a low-pressure hose, brush and clean cloth around shock shafts, pivots and the motor area.
Do E-MTBs wear suspension faster than normal mountain bikes? Often, yes. They are heavier, climb more frequently under motor assistance, and put more repeated load through the rear linkage. Riding style and cleaning habits still matter more than the motor alone.